

Snipr Tattile Integration

Please follow instructions below to set your Tattile ANPR Camera to talk to the SNIPR Cloud
Ensure that your Tattile ANPR Camera is online and on a network with internet access.
Phase 1: Configuring your camera to forward ANPR Events
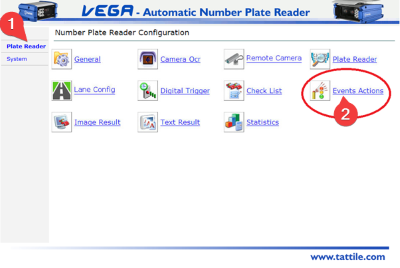
Once you are logged into your camera navigate to the Plate Reader menu located on the left of the screen.
Select the Event Actions.
Once done. You will then need to set the camera to forward ANPR events to SNIPR. To do this, you need to use the cameras TCP Message function. Below are the steps required to do this.
Phase 2: Configuring your ANPR Camera to forward reads to SNIPR
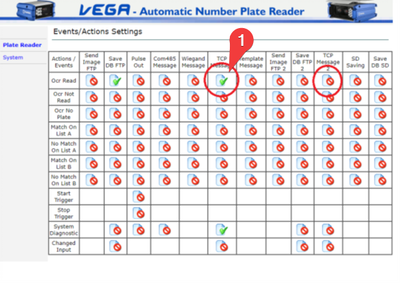
If there is already a Tick for TCP Message then look for a Tick under TCP Message 2 for OCR. Click on the one without the green Tick. In This example we have already used TCP Message 1.
Phase 3: Configuring your ANPR Camera event forwarding to SNIPR
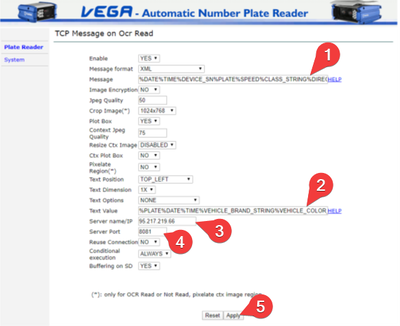
Insert the highlighted text into the Message field:
%DATE%TIME%DEVICE_SN%PLATE%SPEED%CLASS_STRING%DIRECTION%VEHICLE_TYPE%TRANSIT_ID%IMAGE_BW%OCRSCORE%PLATE_MIN_X%PLATE_MIN_Y%PLATE_MAX_X%PLATE_MAX_Y
If the camera supports make, model, color, gps, etc then use the below text in the message field.
%DATE%TIME%DEVICE_SN%PLATE%SPEED%DIRECTION%TRANSIT_ID%IMAGE_BW%OCRSCORE%PLATE_MIN_X%PLATE_MIN_Y%PLATE_MAX_X%PLATE_MAX_Y%SPEED%PLATE_COLOR_STRING%LATITUDE_STRING%LONGITUDE_STRING%VEHICLE_COLOR_STRING%VEHICLE_BRAND_STRING%VEHICLE_TYPE%CLASS_STRING%IMAGE_CTXInsert the highlighted text into the Text field:
%PLATE%DATE%TIME%VEHICLE_BRAND_STRING%VEHICLE_COLOR_STRINGThe Server name/IP field should have the following inserted:
95.217.219.66The Server Port should have the following inserted:
8081Click Apply once everything is set correctly.
Once done. You will then need to set the camera to forward ANPR events to SNIPR. To do this, you need to use the cameras TCP Message function. Below are the steps required to do this.
Phase 4: Acquiring your camera's unique Identifier
It is imperative that the correct serial number is provided to our support team. So that we may provision your camera on our systems correctly. Follow the steps below on how to do this.
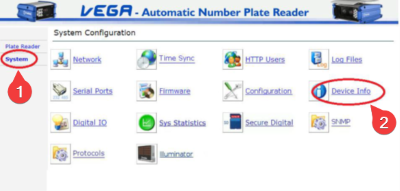
Navigate back to the System main menu, by selecting System on the left hand side of the window.
Once there select Device Info.
Phase 5: Submitting your camera serial number.
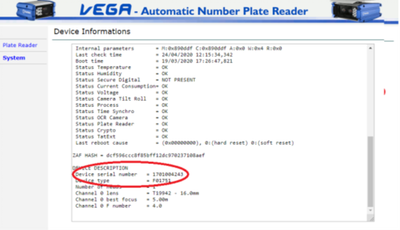
If you have followed the steps in Phase 4, you should now be on the page referenced in the image to the right under Phase 5 of this tutorial. The serial number is highlighted in the image for your reference.
Please submit, either a clear screen shot of this page or the serial number to our support team. Be sure to accurately capture this number. Failure to do so will result in our system not acknowledging the reads being sent.
Important!
Remember to follow through with Phase 4 and Phase 5 and submit the Serial of your Tattile ANPR Camera (captured in Phase 4 and 5 of this guide) through to Support@one-space.co.za along with your take on form. And our team will conclude the onboarding process for you.