


SARS Border Visitor Enrollment

This guide explains how logistics-company drivers register themselves for access through a SARS border post, and what happens to their record once SARS receives it. The registration itself is completed by the visitor on their own phone. As a SARS Manager, your involvement is setting up the public link and — depending on your configuration — approving the applications that come in.
How the process works, end to end
SARS shares a registration link or QR code with the logistics companies.
The driver opens it and completes the Border Registration wizard on their phone.
On submission, the application is handled according to your Public Visitor Registration settings — it is either auto-approved or held for a manager to review within Central.
Once approved, the applicant becomes a Person on the SARS Central platform, ready to be managed under Access Control.
This guide will address the following:
Get the registration link or QR code
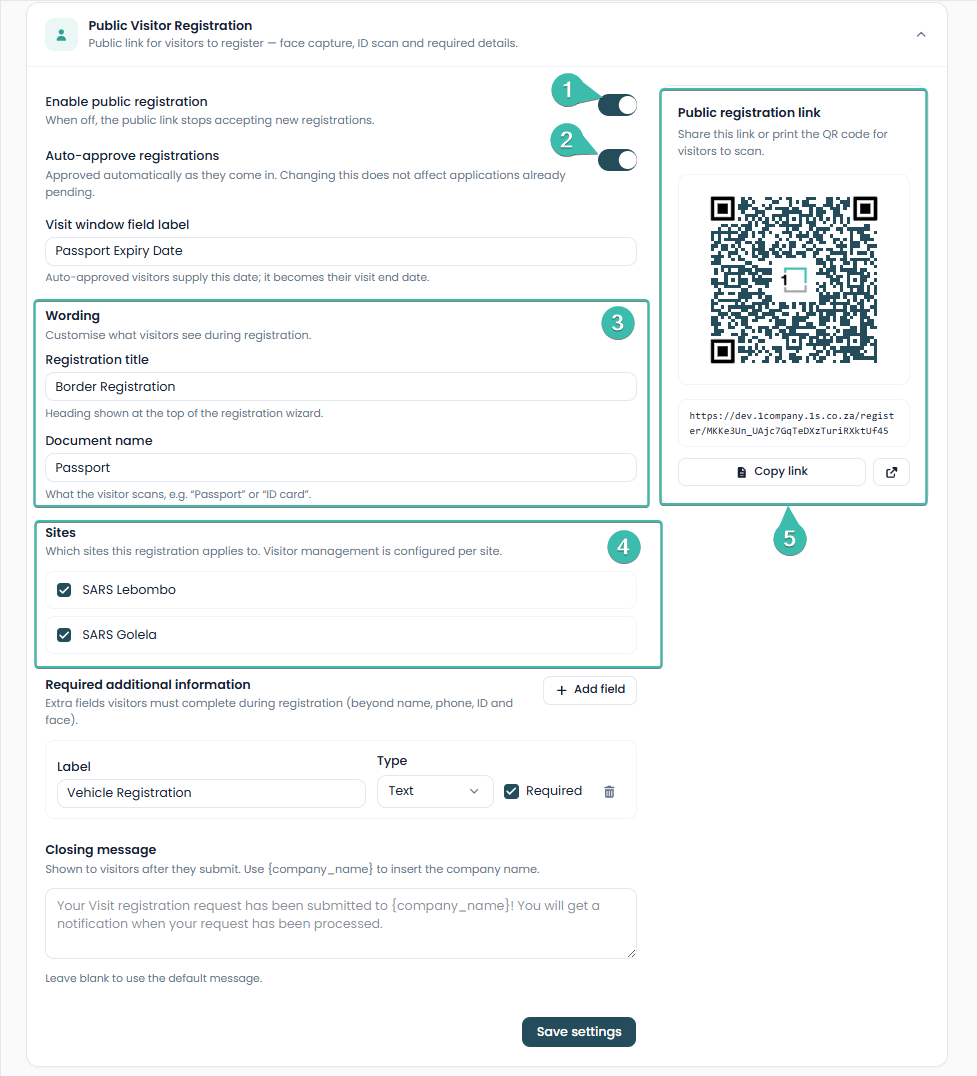
Turn on Enable public registration. While this is off, the public link stops accepting new registrations.
Set Auto-approve registrations to suit how SARS wants to handle applications:
On — applications are approved automatically as they arrive, and the applicant is added to Central without further action.
Off — each application is held for a manager to review and approve. See Part 3 below.
Note: changing this setting does not affect applications that are already pending.
Confirm the wording shown to visitors, such as the Registration title (“Border Registration”) and the Document name the visitor will scan (“Passport”).
Under Sites, confirm which sites this registration applies to. Visitor management is configured per site.
In the Public registration link panel on the right, either:
Select Copy link to share the registration URL with the logistics companies, or
Print or share the QR code for drivers to scan.
The link and the QR code lead to the same registration wizard — send whichever is easier for the companies you are working with.
The visitor’s registration wizard
This is what the driver sees after opening the link or scanning the QR code. It is shown here so you understand what information is collected and can support drivers who get stuck. The progress bar at the top of each screen shows how far along they are.
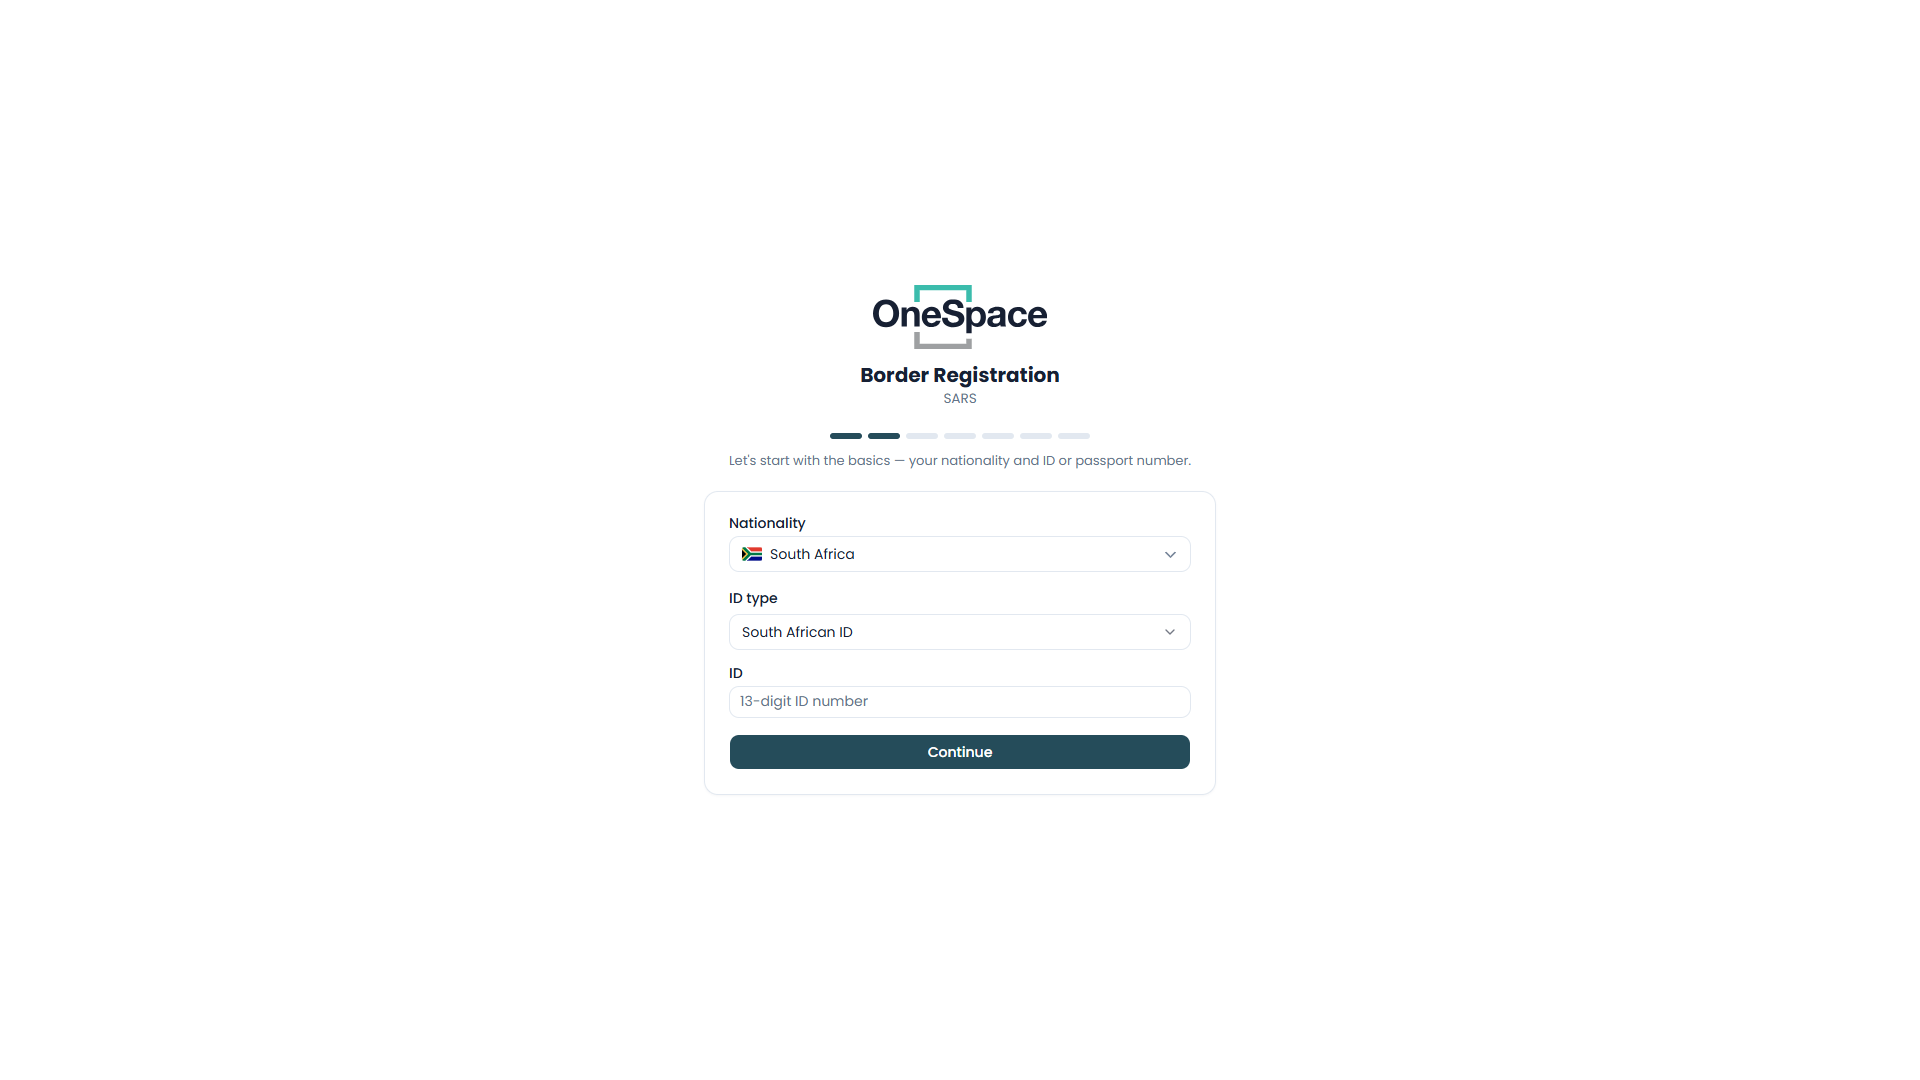
Step 2 — Nationality and ID
Choose a Nationality.
Choose an ID type (for example, South African ID).
Enter the ID number.
Select Continue.
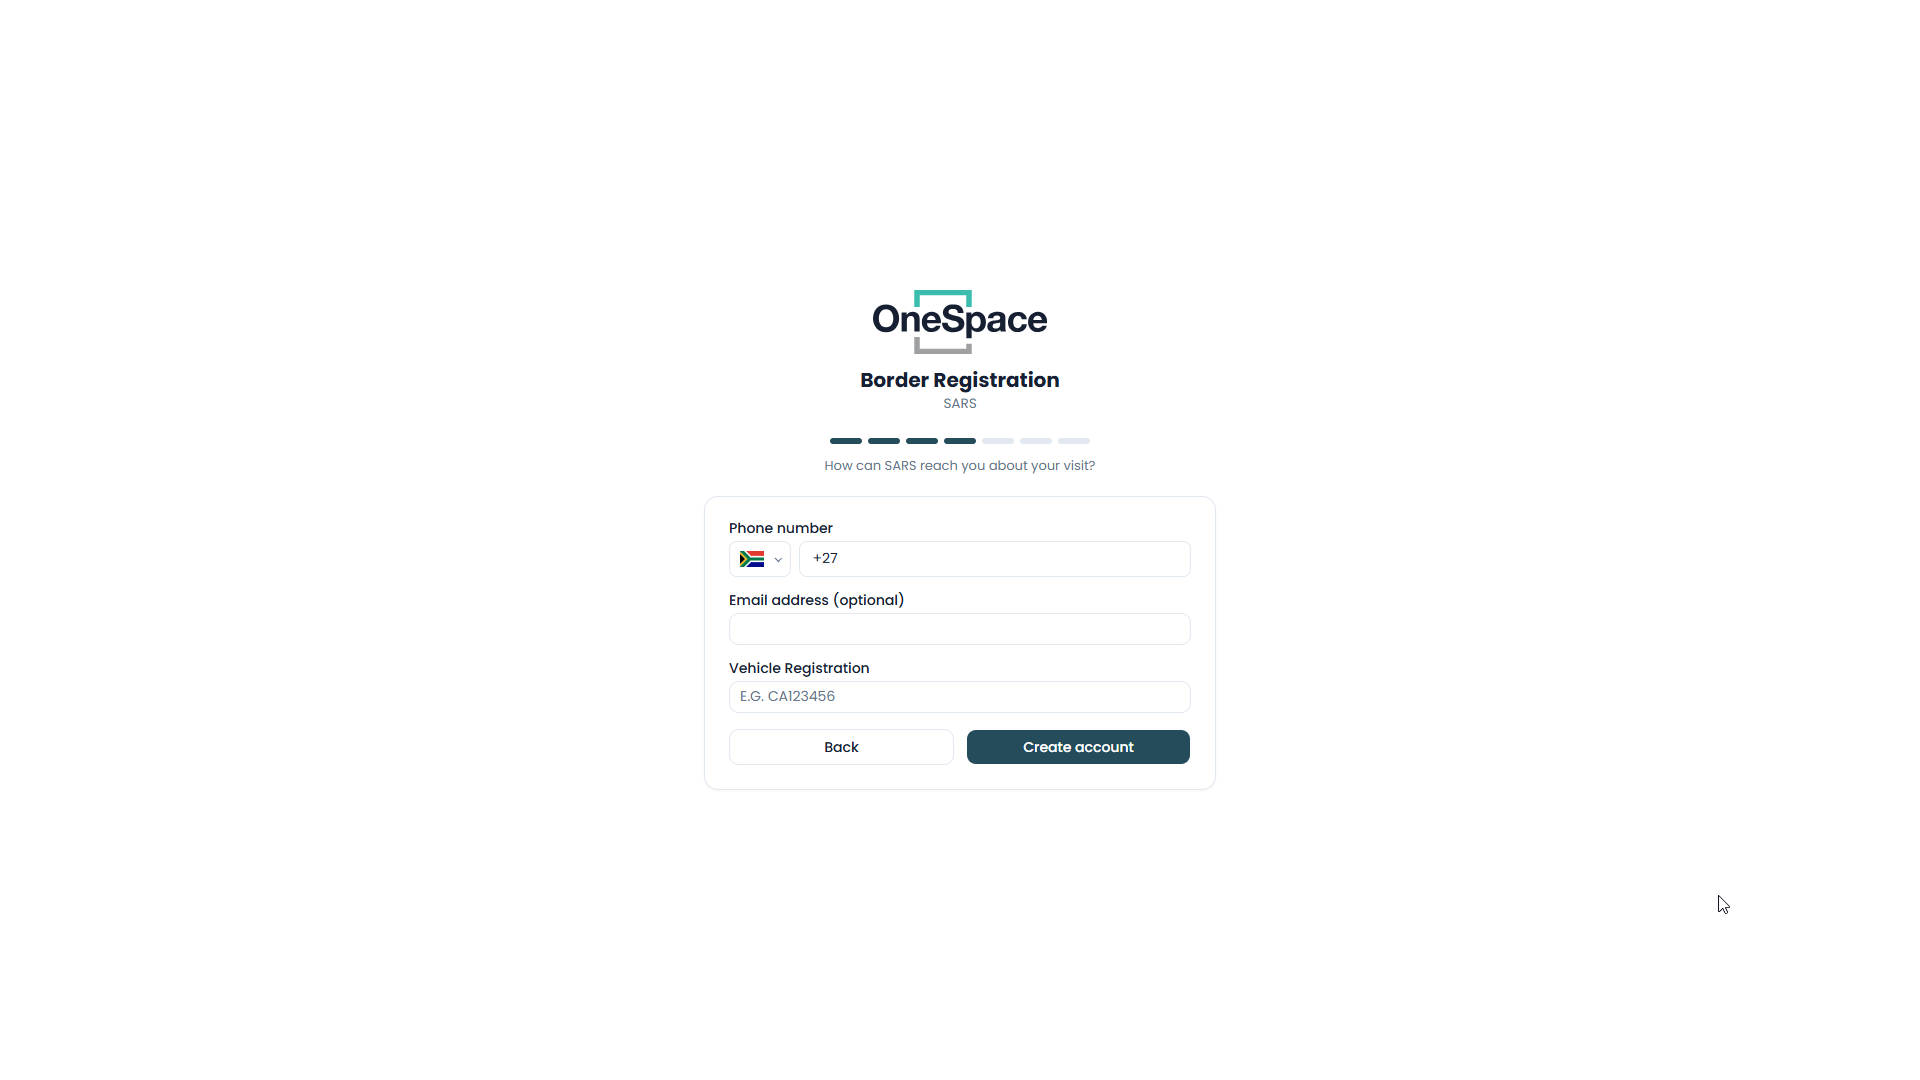
Step 4 — Contact and vehicle
Enter a Phone number.
Enter an Email address (optional).
Enter the Vehicle Registration.
Select Create account.
Note: the fields shown here beyond name, phone, ID and face — such as Vehicle Registration — are the extra fields configured under Required additional information on the configuration page.
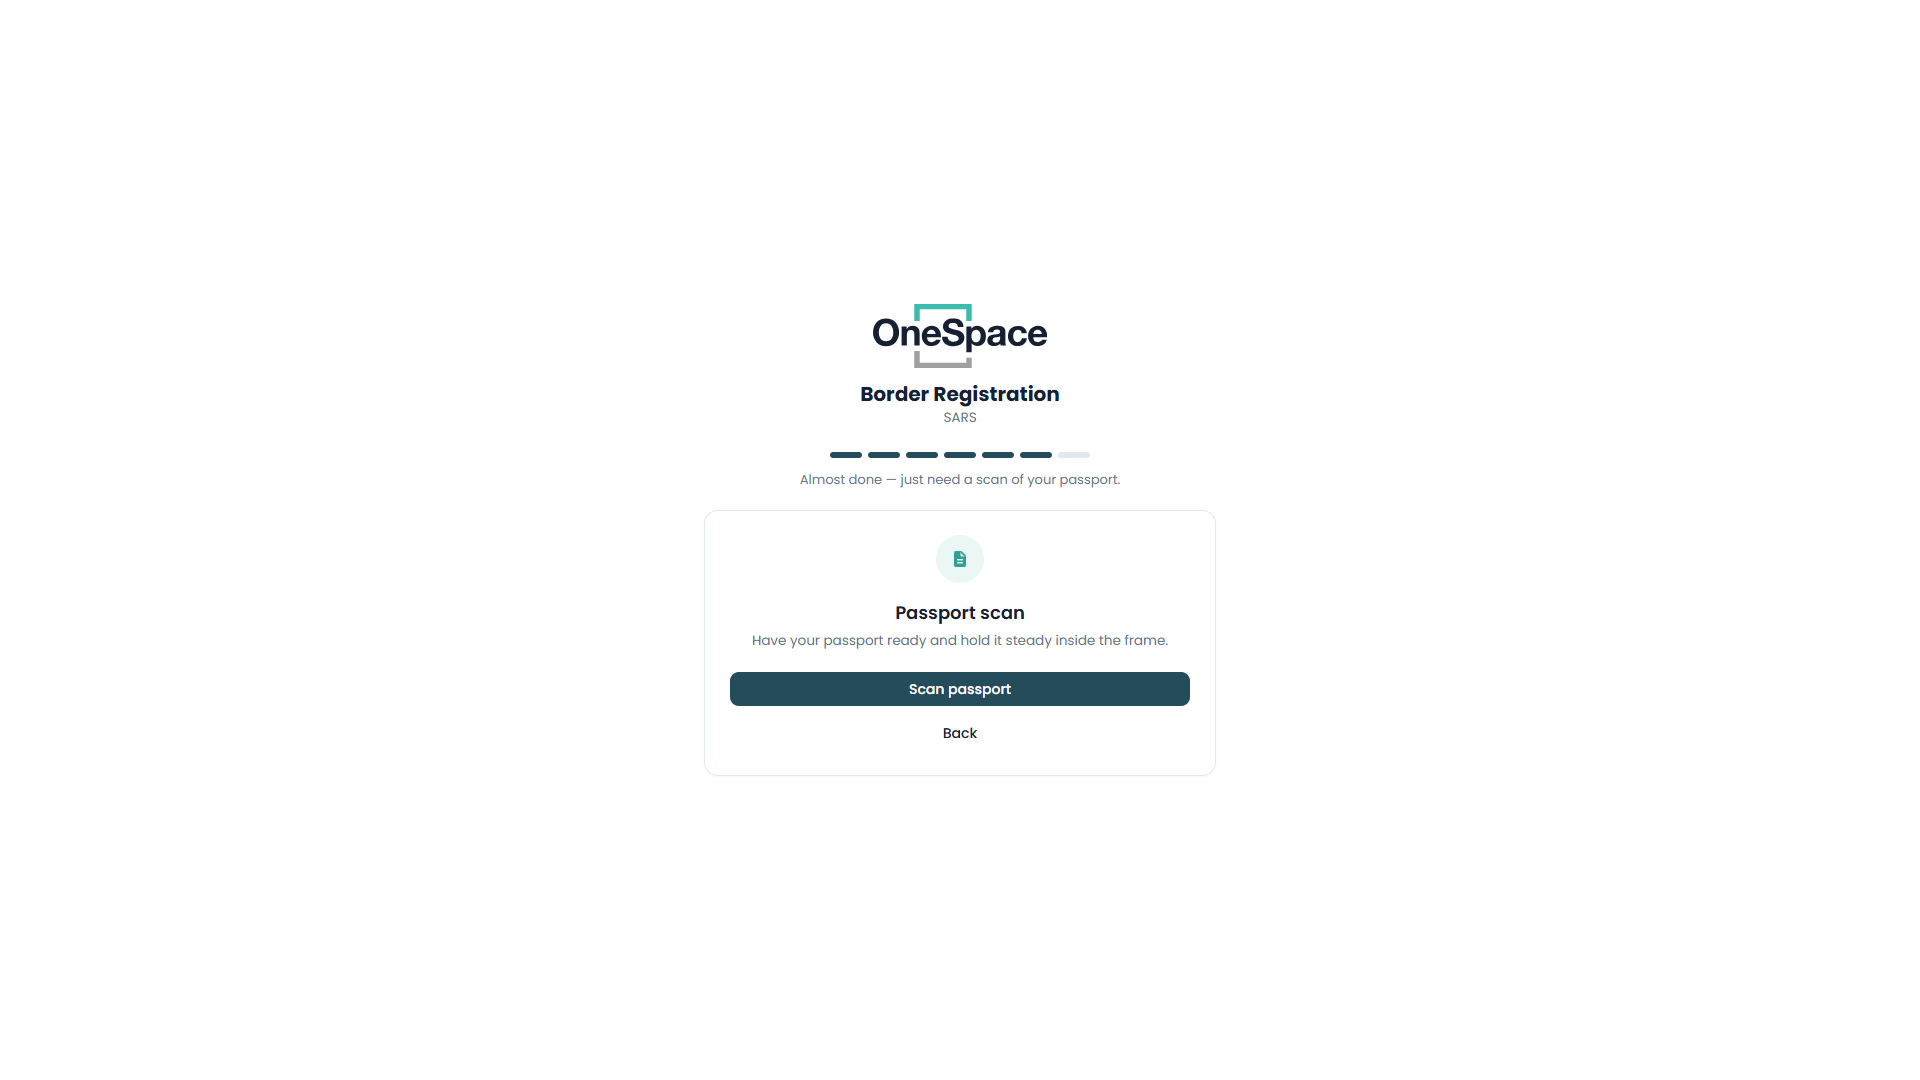
Step 6 — Passport scan
Have the passport ready and hold it steady inside the frame.
Select Scan passport.
The document being scanned matches the Document name set on the configuration page (here, “Passport”).
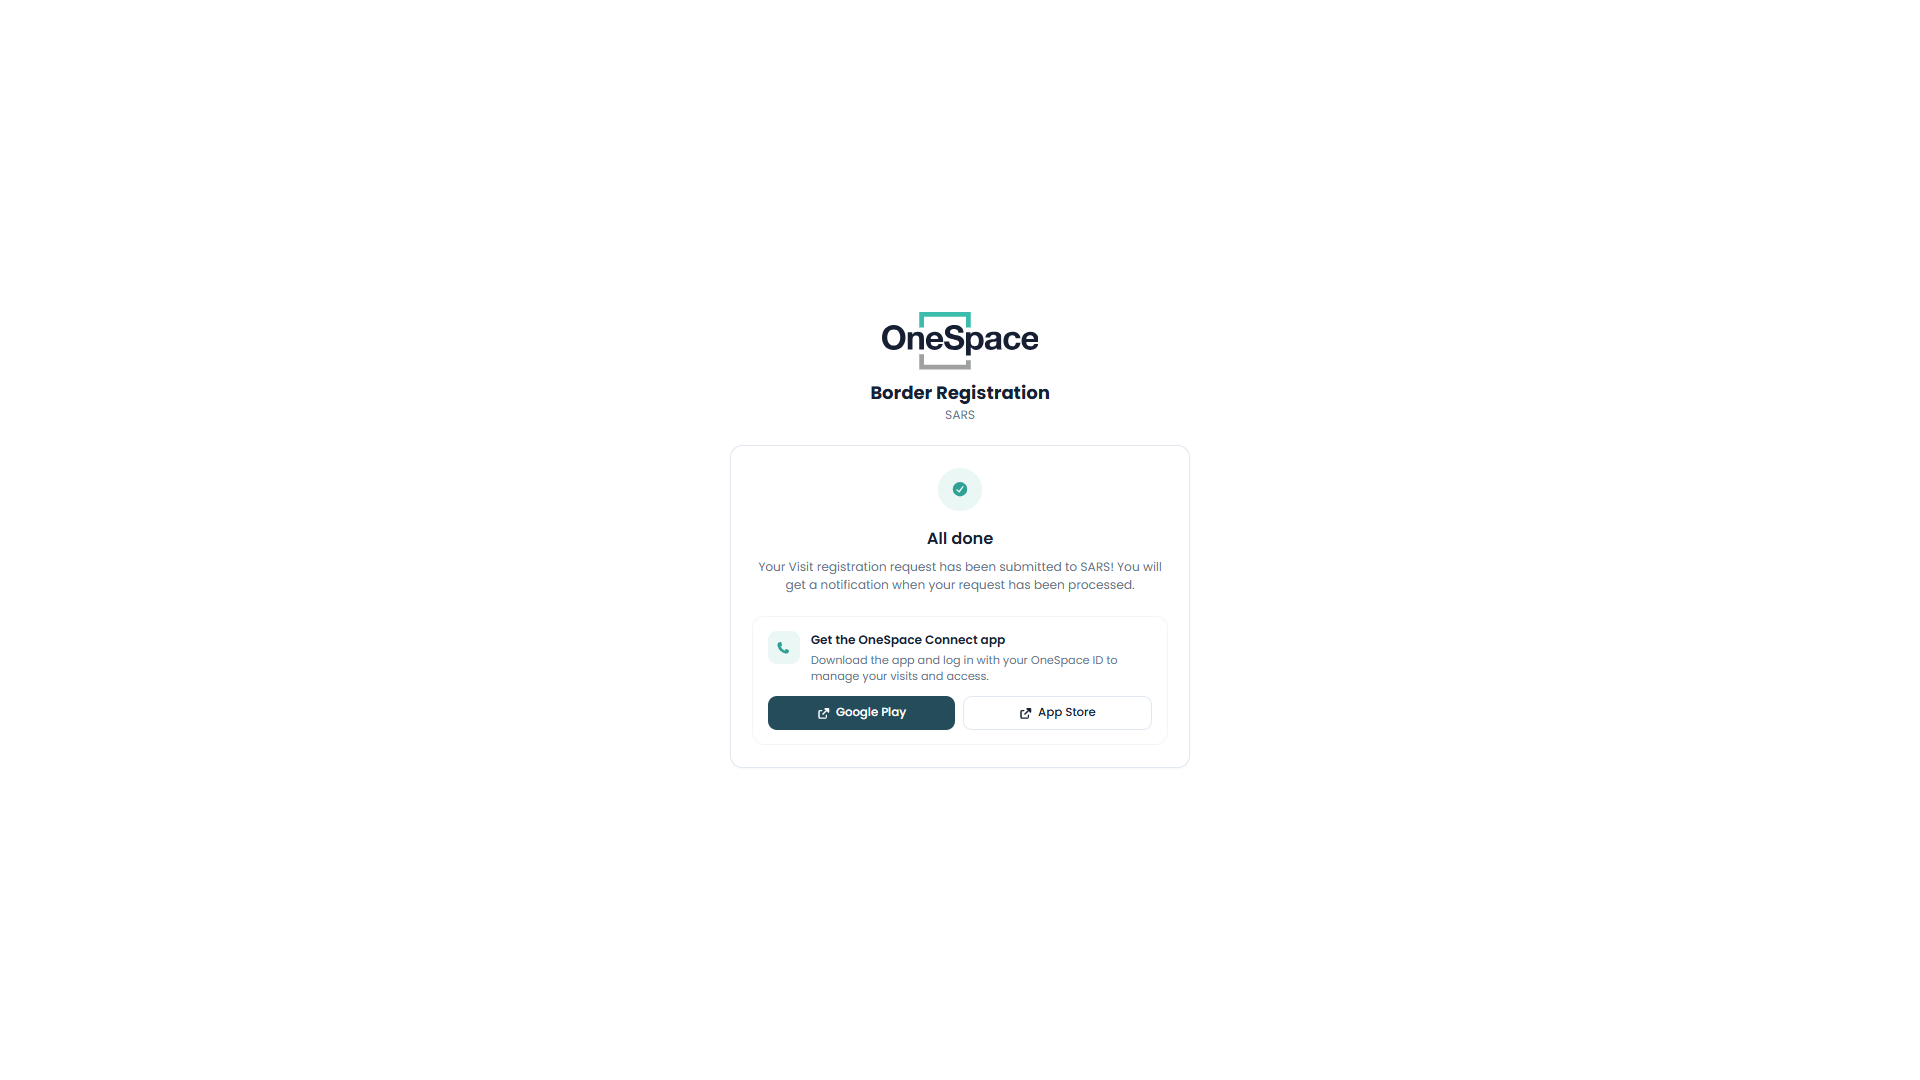
Step 8 — All done
The visitor sees a confirmation that their registration request has been submitted to SARS, and that they will be notified once it has been processed. They are also prompted to download the OneSpace Connect app to manage their visits and access.
The closing message shown here can be customised in the Closing message field on the configuration page.
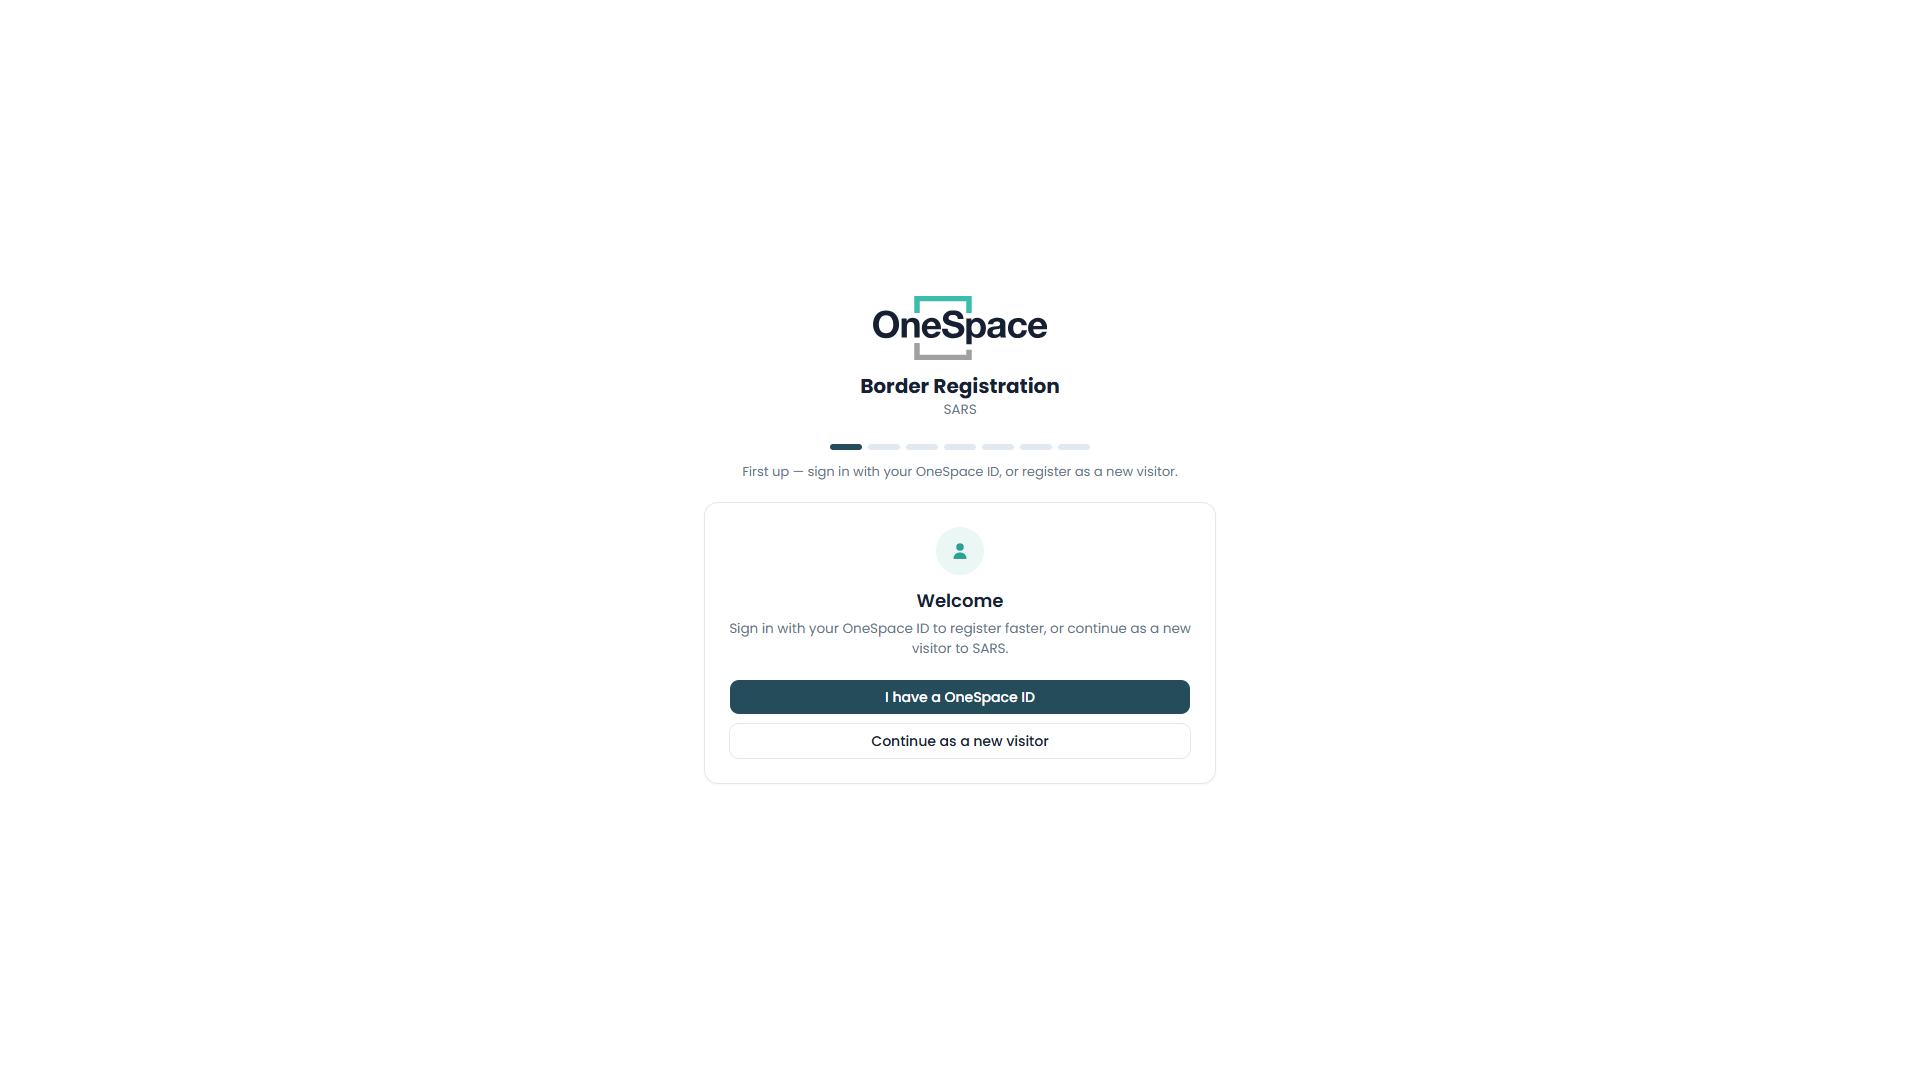
Step 1 — Welcome
The visitor chooses how to start:
Select I have a OneSpace ID to sign in and register faster.
Select Continue as a new visitor to register from scratch.
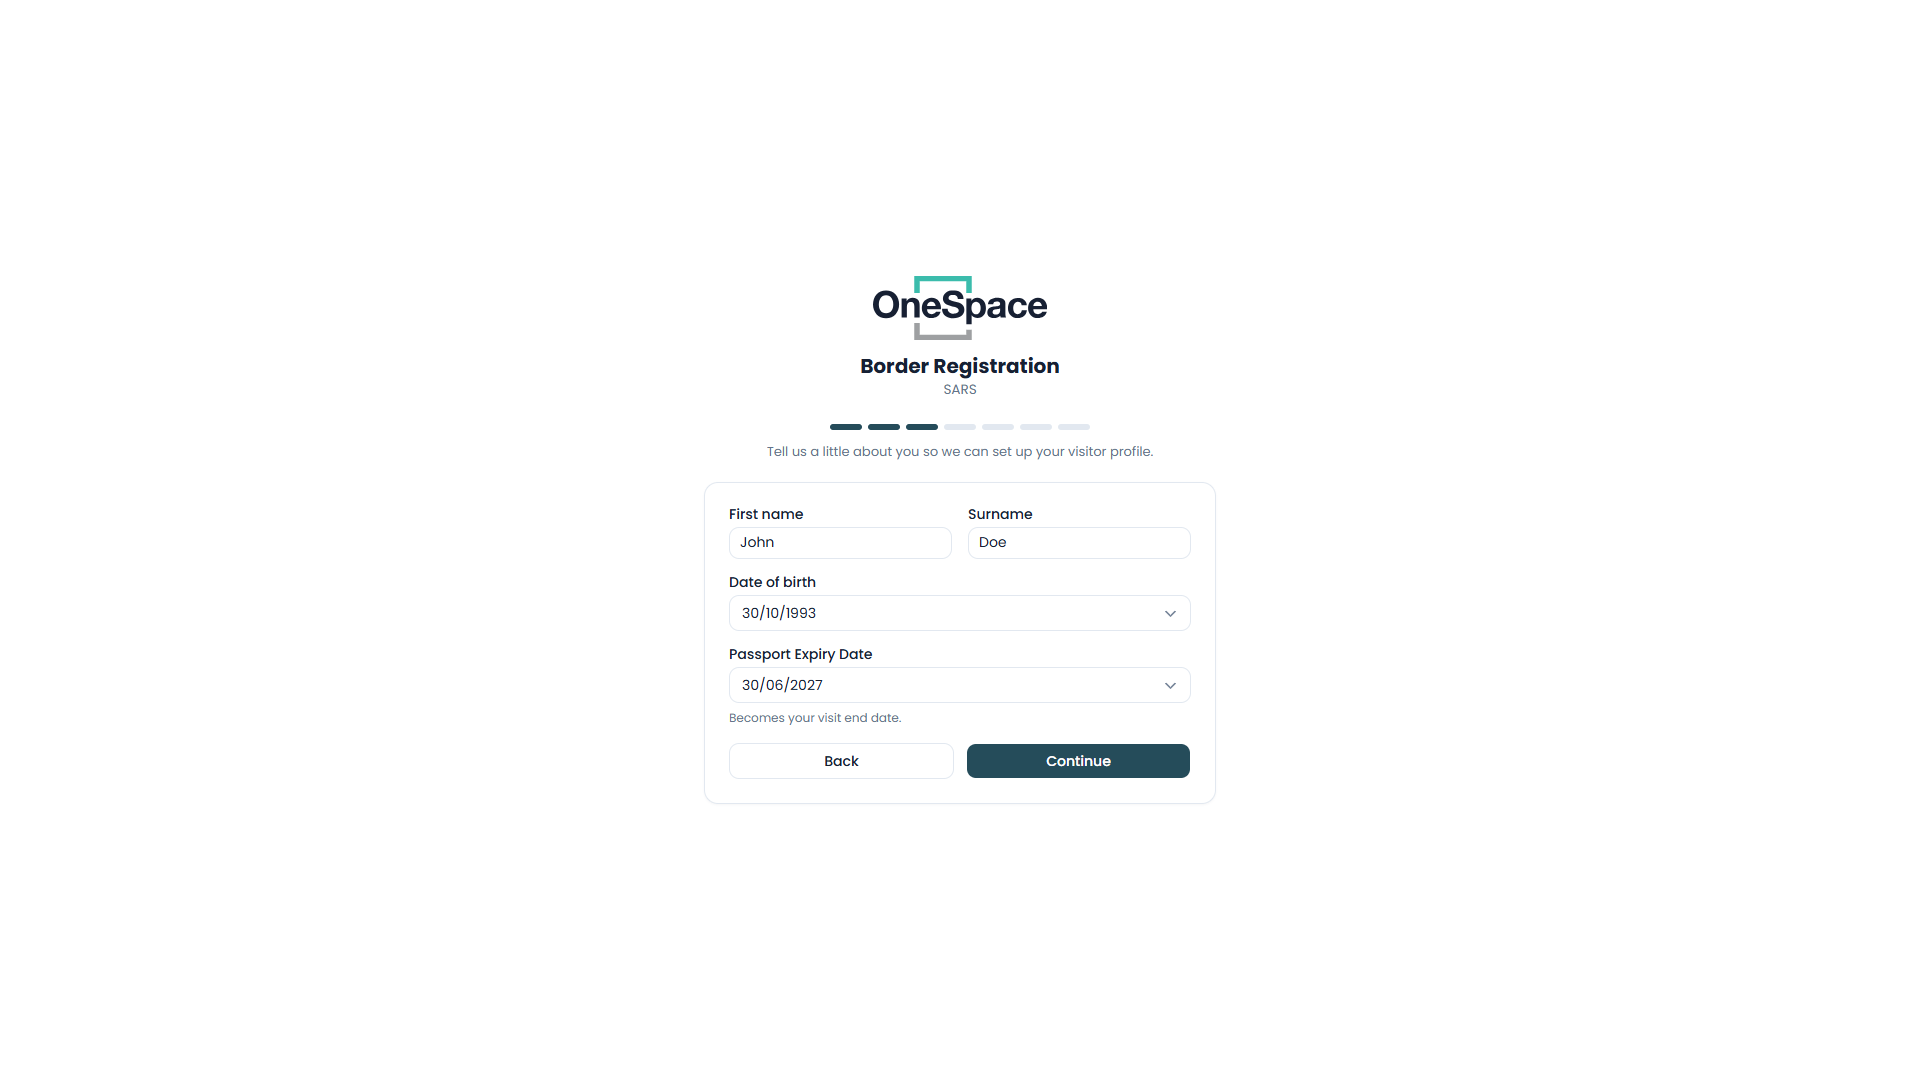
Step 3 — Personal details
Enter First name and Surname.
Enter Date of birth.
Enter the Passport Expiry Date. This becomes the visitor’s visit end date.
Select Continue.
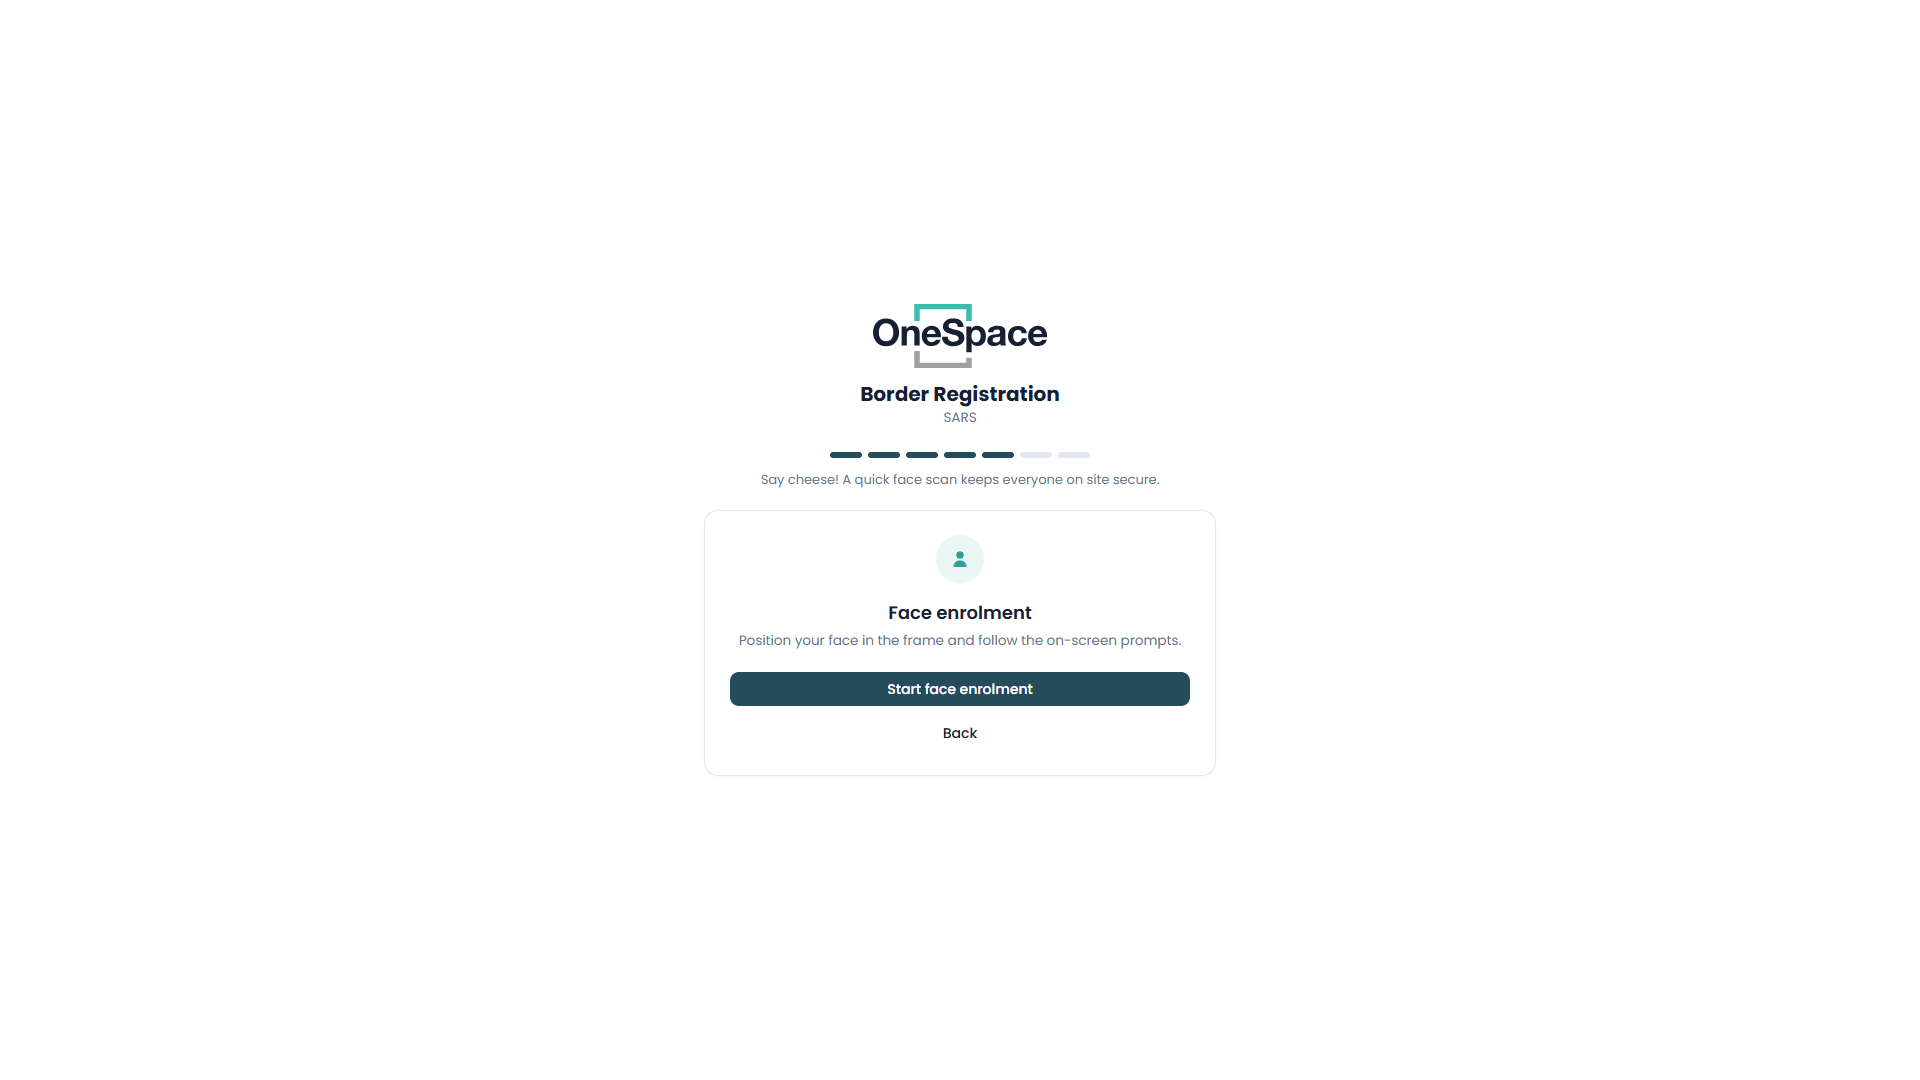
Step 5 — Face enrolment
Read the on-screen instruction to position the face in the frame.
Select Start face enrolment.
Frame the face inside the oval.
Select I'm Ready and move closer as prompted to complete the scan.
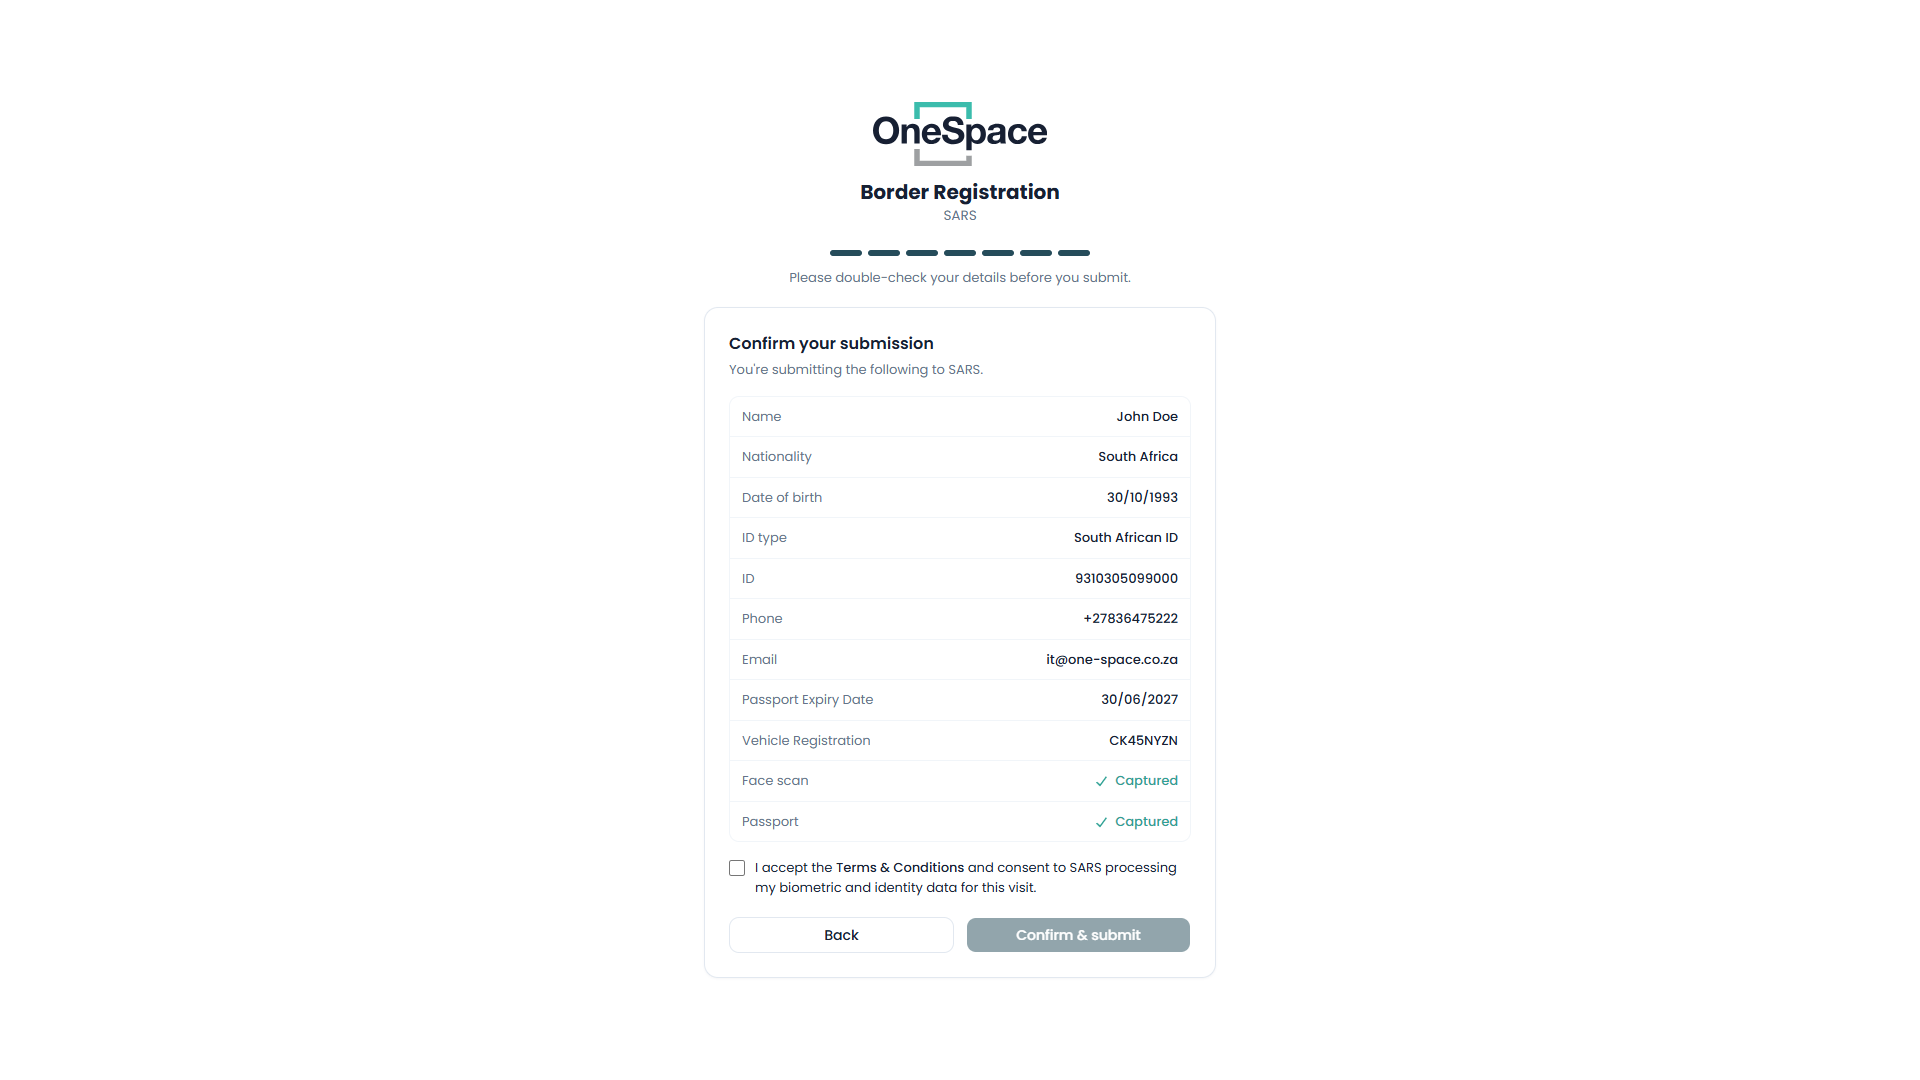
Step 7 — Confirm and submit
Review the summary of all captured details, including the Face scan and Passport showing as Captured.
Tick the box to accept the Terms & Conditions and consent to SARS processing the biometric and identity data for the visit.
Select Confirm & submit.
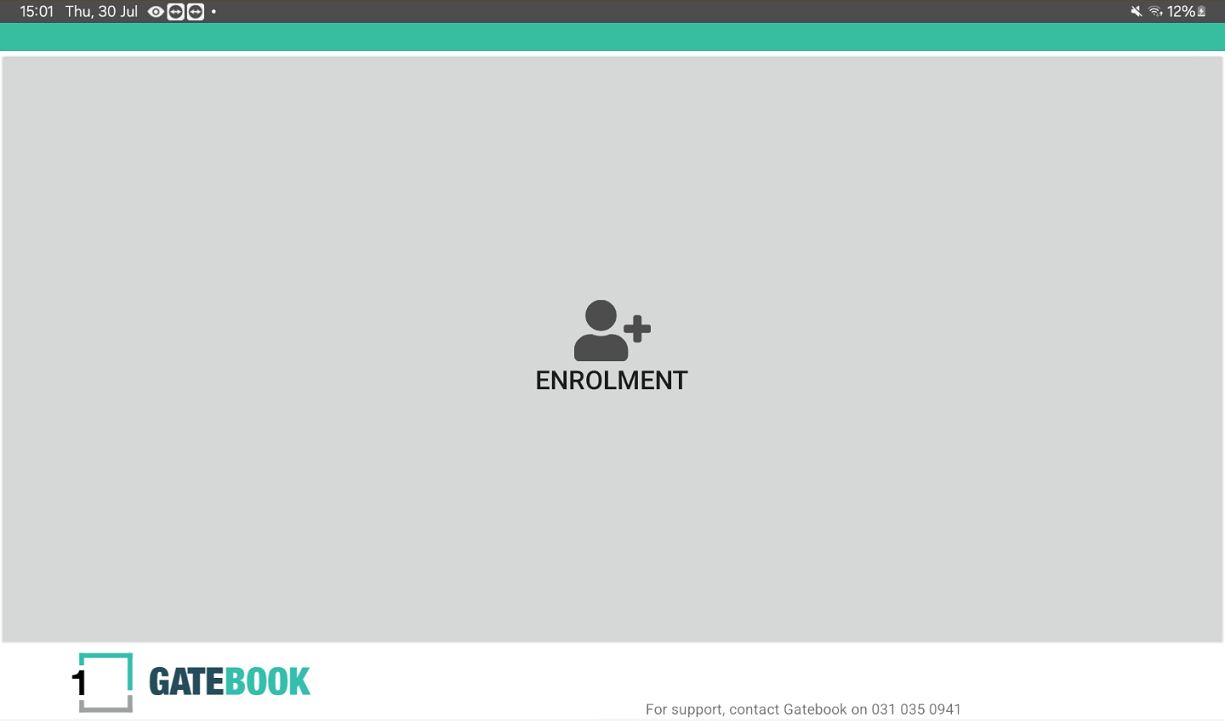
Enrollment of Drivers via Gatebook (Kiosk)
This is what the Border Post Agent would see on their GateBook scanner or Tablet, when they need to capture an unannounced driver. It is shown here so you understand what information is collected.
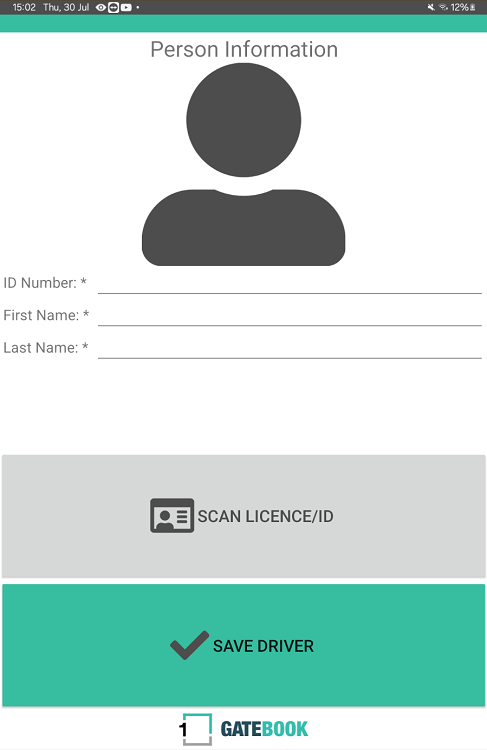
Step 2 — Nationality and ID
The Agent can manually capture the Drivers Details by selecting a field (ID Number, First Name and Last Name).
Selecting the grey Scan License or ID button will prompt the device to start the scanning process to capture the Drivers information.
If this is selected ensure the Driver has their ID Card or Drivers License card ready.
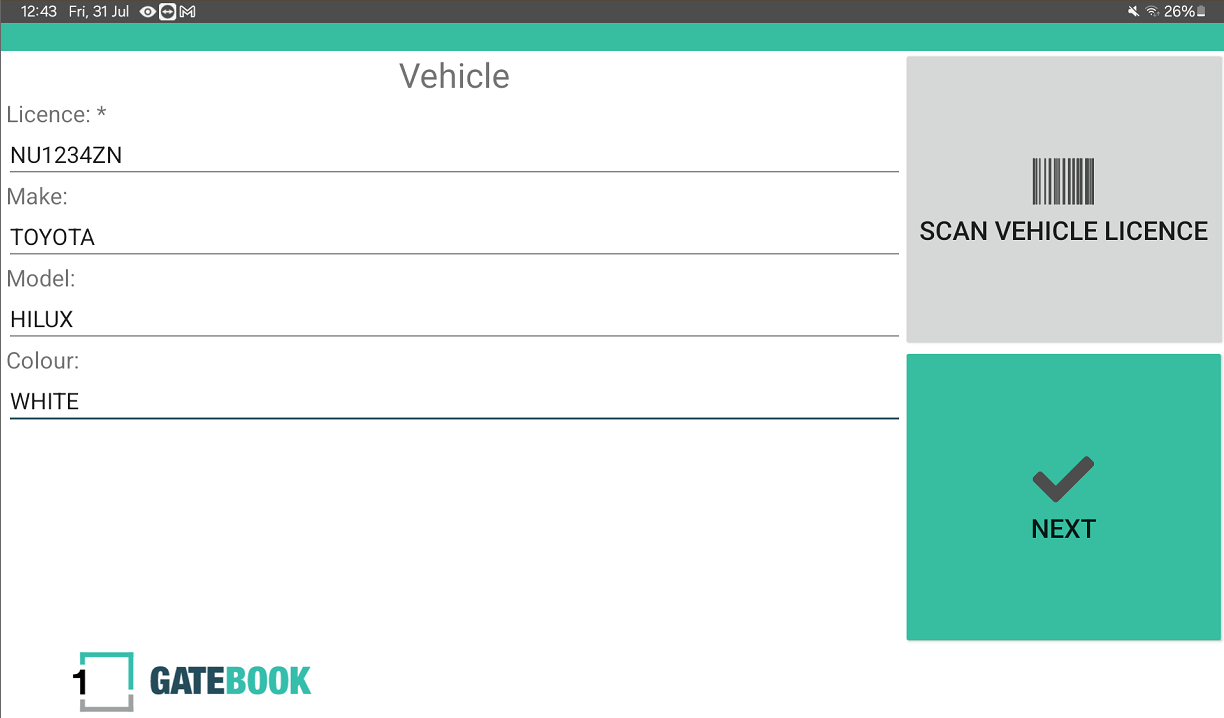
Step 4 — Vehicle Information
The Agent can manually capture the Vehicle Details by selecting any of the fields
Selecting the grey Scan License or ID button will prompt the device to start the scanning process to capture the Drivers information.
Note: The Scan Vehicle License button will only work on GateBook Scanners and not on GateBook Tablets.
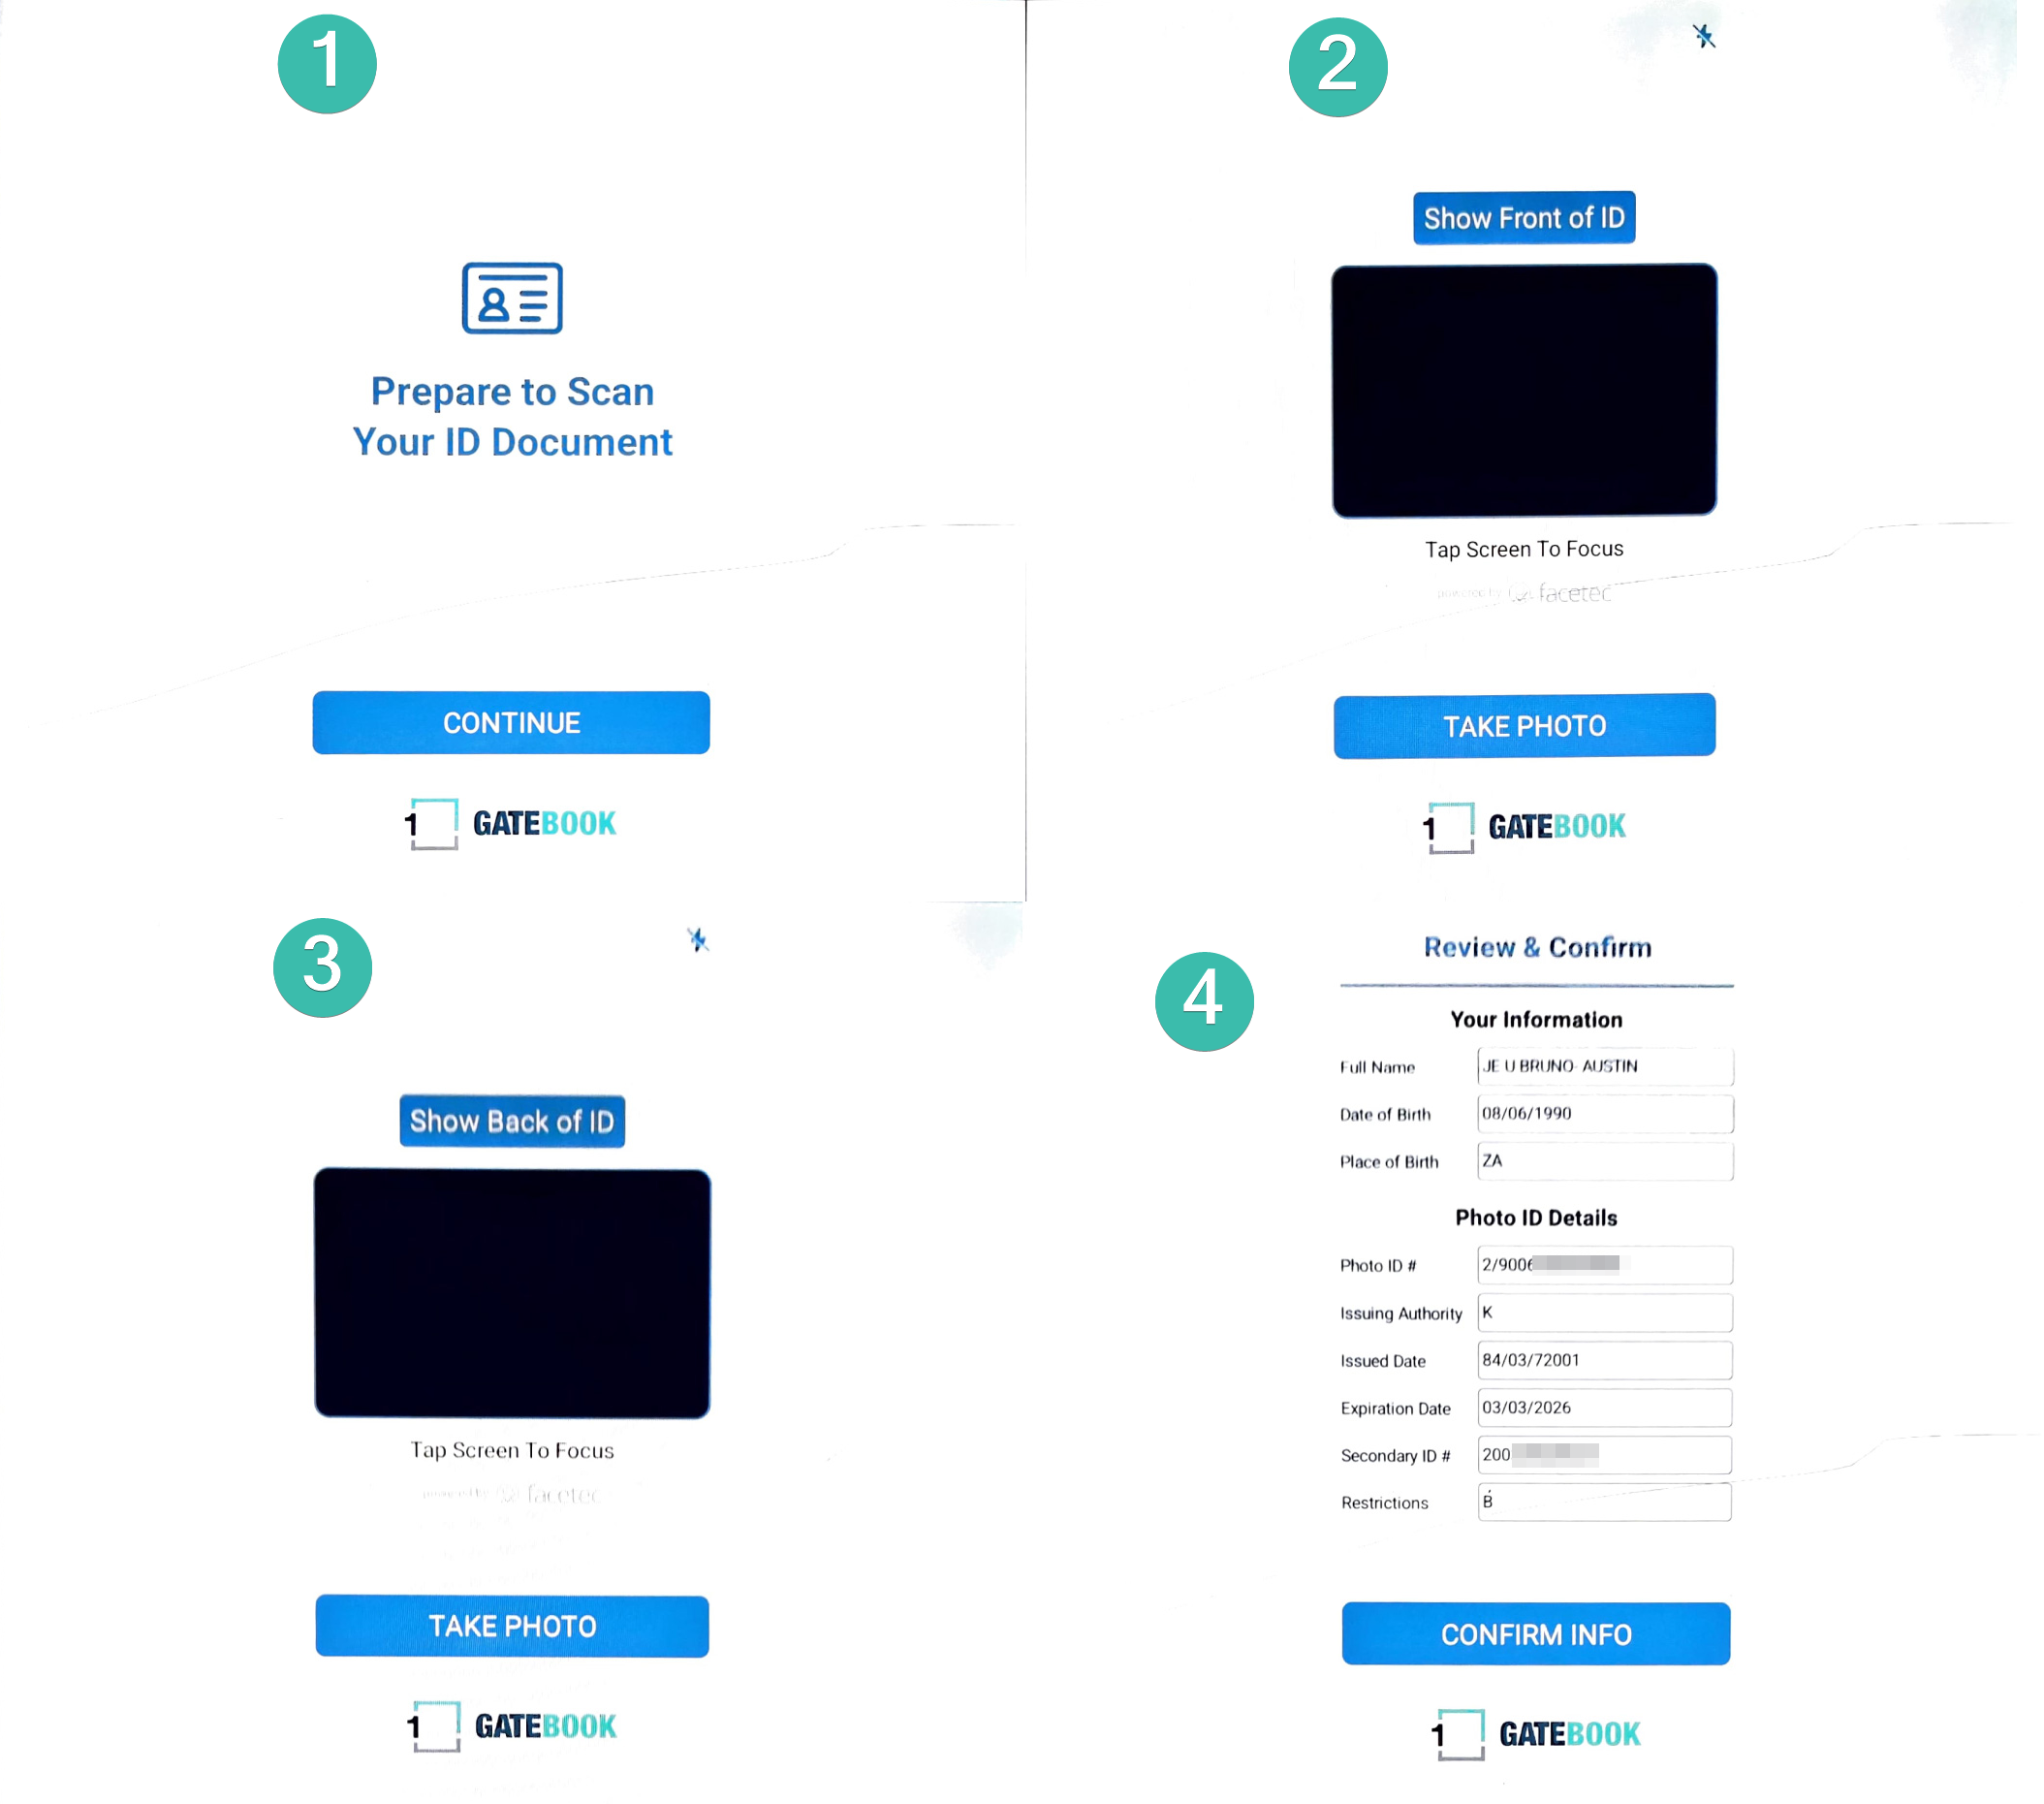
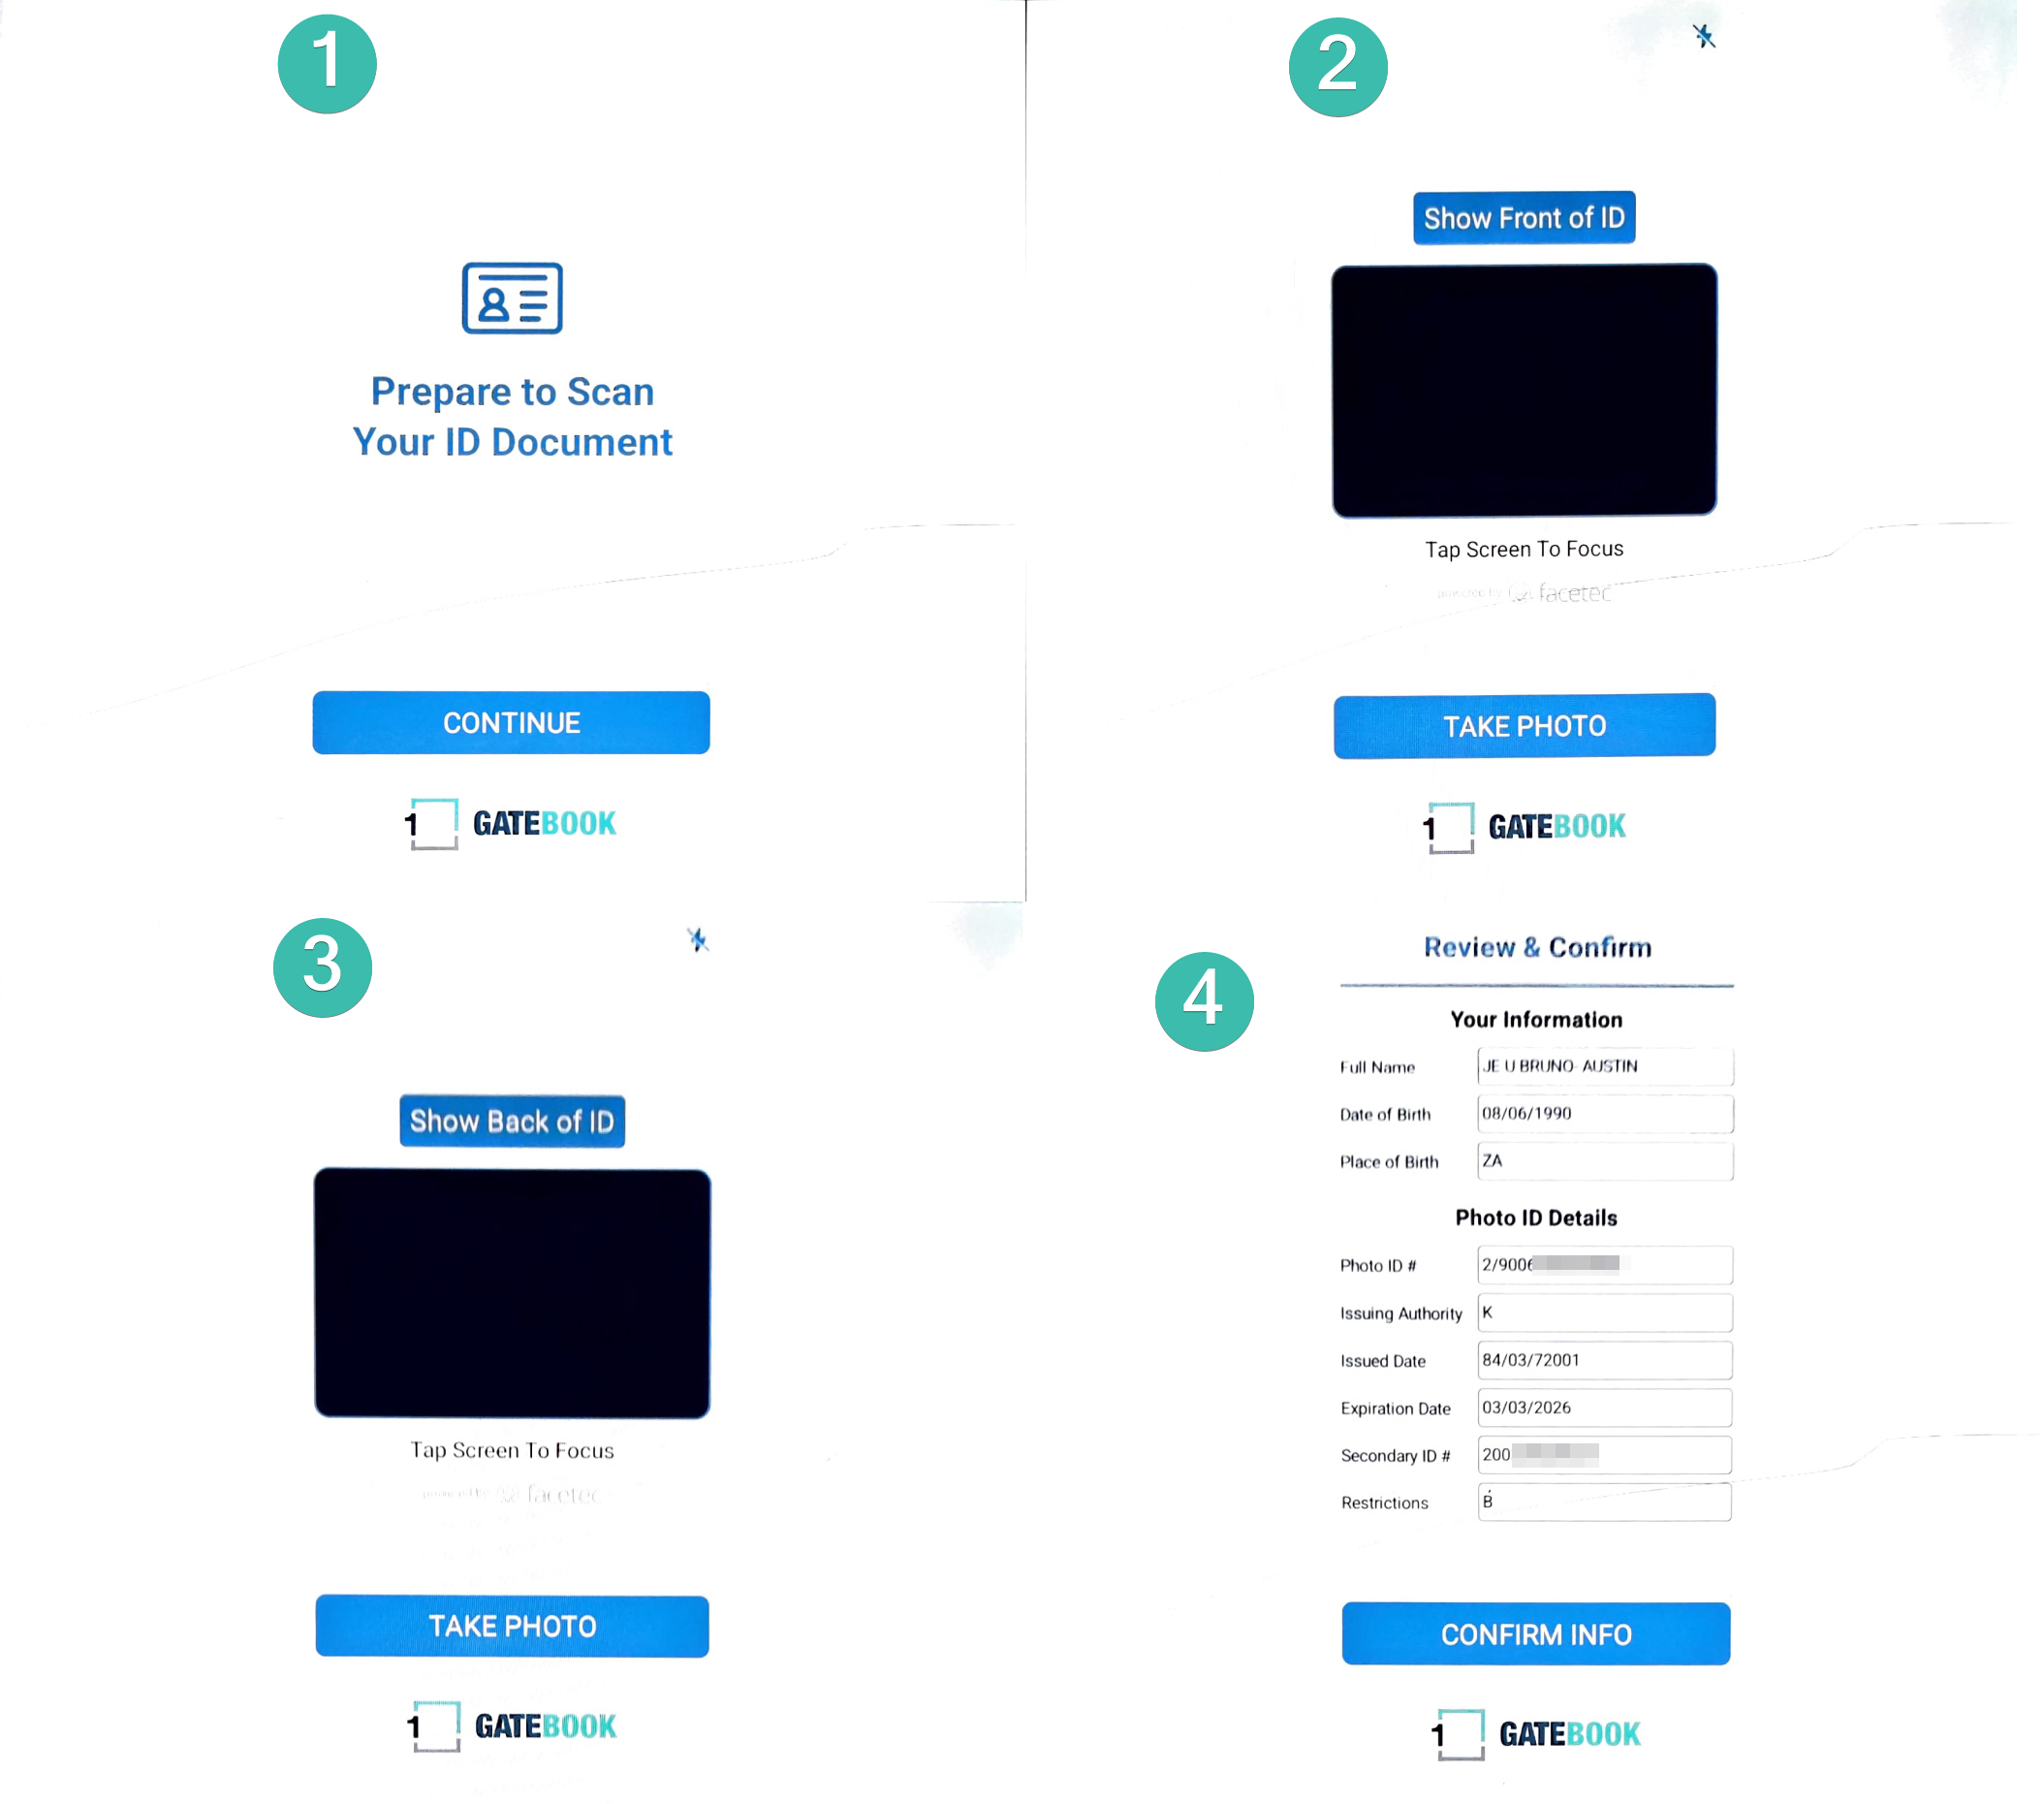
Step 6 — Personal details to be captured into OneAccess
Once you have completed the Face Capture you will need to capture the Visitors ID / Drivers License details again.
Select the blue Continue button once the driver shows you their ID Document / Drivers License.
Present the Front side of the document to the GateBook or Tablet.
Present the Rear side of the document to the GateBook or Tablet.
The Agent can review what was scanned and make changes to the data before saving.
Note: The scanning does have potential to read data incorrectly. The Agent MUST ensure the data is accurate.
It is very important that the details captured at this stage are accurate. As these details will be used to set up the Visitors profile within the Central Access Control System.
Step 1 — Welcome
The visitor chooses how to start:
Select I have a OneSpace ID to sign in and register faster.
Select Continue as a new visitor to register from scratch.
Step 3 — Personal details
Select the blue Continue button once the driver shows you their ID Document / Drivers License.
Present the Front side of the document to the GateBook or Tablet.
Present the Rear side of the document to the GateBook or Tablet.
The Agent can review what was scanned and make changes to the data before saving.
Note: The scanning does have potential to read data incorrectly. The Agent MUST ensure the data is accurate.
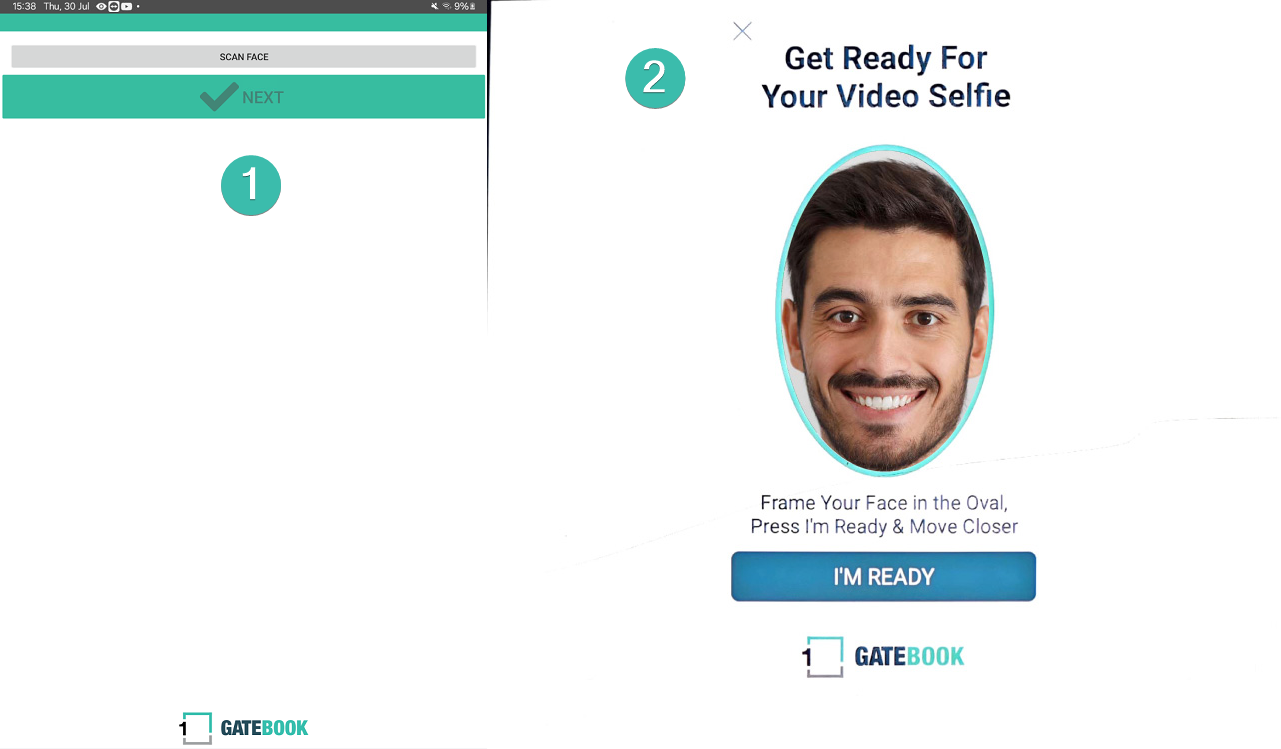
Step 5 — Face enrolment
Select the grey Scan Face button to start capturing the visitors Face template for Biometric Access Control.
Read the on-screen instruction to position the face in the frame.
Select Start face enrolment.
Frame the face inside the oval.
Select I'm Ready and move closer as prompted to complete the scan.
After the visitor submits
If auto-approve is ON
The application is approved automatically. The applicant becomes a Person on the SARS Central platform and is set up with the access rights that let them pass through the SARS Access Control system — no further action needed from a manager.
If auto-approve is OFF
Each application is held for a manager to review and approve before the applicant is added to Central. Approvals are handled through the Join Requests area. For the full step-by-step on reviewing and approving requests, see the Resource Centre:
🔗 Conducting approvals (Join Requests) — OneSpace Resource Centre
Managing the person on Central
Once an applicant is approved and exists as a Person on Central, you manage their access the same way you manage any other person on your site. Rather than repeat it here, use the Resource Centre, where this is fully documented:
🔗 What Access Rights are — understand how a right controls when and where an access method can be used.
🔗 Giving and managing a person’s access rights — add or edit access methods and access rights by selecting the person’s name.